Tired of that constant drip from your shower? Learn how to diagnose and replace a faulty shower cartridge yourself, saving hundreds on a plumber.
- April 19, 2026
AceShowbiz - That faint, persistent drip from your showerhead after you turn the water off is more than just an annoyance—it's a slow drain on your wallet and a waste of a precious resource. According to the Environmental Protection Agency, a single leaky showerhead can waste over 500 gallons of water a year. That's enough to fill a small swimming pool, and it's adding dollars to your utility bill every month. You've probably tried tightening the handle or hoping it magically stops, but the truth is, the culprit is almost always a worn-out cartridge inside your shower valve.
Replacing a shower cartridge might sound intimidating, like a job strictly for professionals. But with the right guidance and a bit of patience, it's a project well within the reach of most homeowners. This isn't about a full bathroom renovation; it's about a targeted, practical repair that restores peace, quiet, and efficiency to your daily routine. Let's demystify the process and give you the confidence to tackle that drip once and for all.
Understanding the Heart of Your Shower: The Cartridge
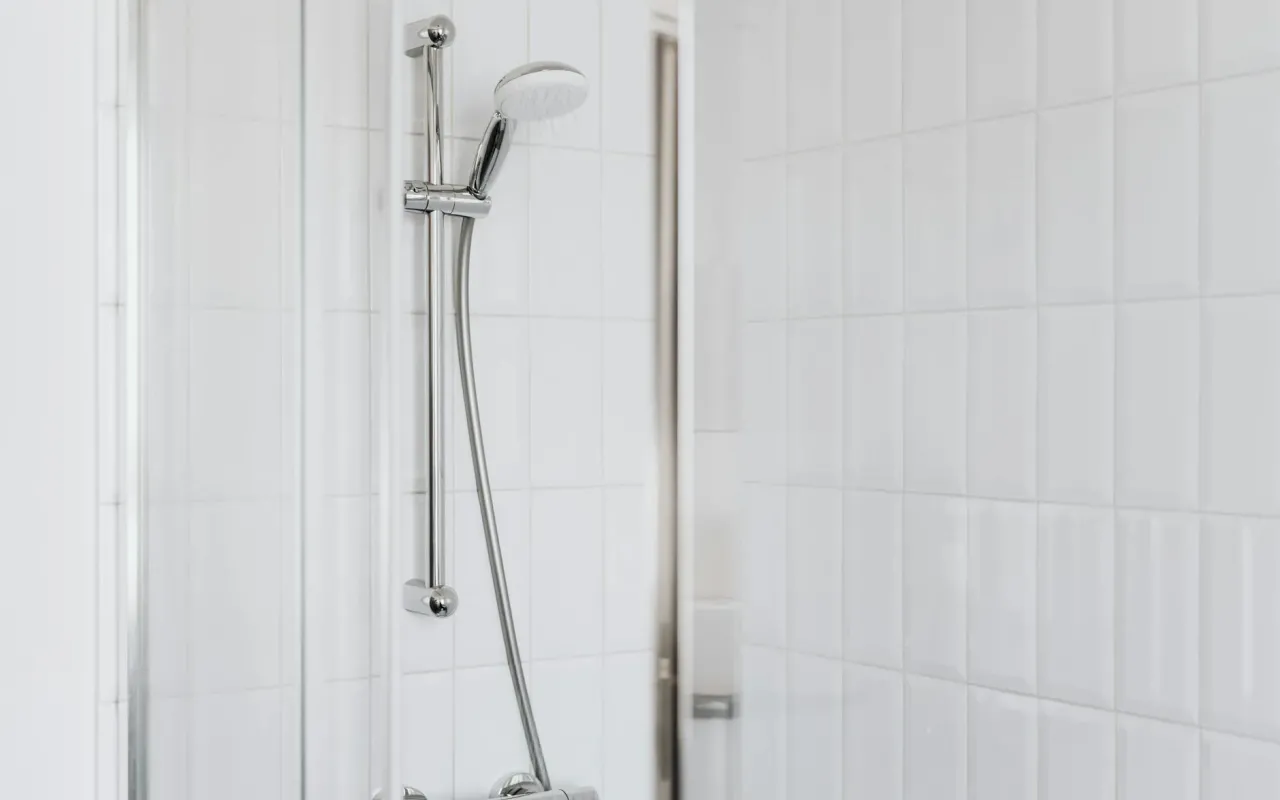
Before you grab a wrench, it's crucial to know what you're dealing with. The shower cartridge is the control center inside your shower valve. When you turn the handle to adjust temperature and flow, you're moving this internal component. It's a precisely engineered piece of plastic and rubber with small ports and seals that align to mix hot and cold water and regulate pressure.
Over years of use, mineral deposits from hard water build up on these parts, and the rubber seals and O-rings inevitably degrade. This wear is what causes the leaks—either a drip from the showerhead when the water is off (a pressure-balancing issue) or water sneaking out around the handle or escutcheon plate (a seal failure). The cartridge is the sacrificial part designed to wear out so the more expensive valve body in your wall doesn't have to.
Different brands use different cartridge systems. Major players like Moen, Delta, Kohler, and Pfister have their own proprietary designs. A Moen cartridge looks nothing like a Delta one. This means identification is your first and most critical step; installing the wrong cartridge is a surefire way to make the problem worse. Your mission is to become a shower detective before you become a plumber.
Actionable Tip: Start by identifying your faucet brand. Look for a logo on the handle, escutcheon plate, or showerhead. If it's not visible, the shape of the handle and plate can often give it away—a quick image search online can help.
Common Symptoms of a Failing Cartridge
How do you know for sure it's the cartridge and not something else? Watch for these telltale signs. The most obvious is that constant drip or trickle from the showerhead long after you've shut the valve. Another is difficulty adjusting temperature—the water might be either scalding hot or freezing cold with very little comfortable range in between. You might also feel stiffness or grinding when you turn the handle, or notice water seeping from behind the handle itself.
Sometimes, the leak isn't even at the shower. A failing pressure-balancing cartridge can cause your toilet to run intermittently or make your sink faucets sputter because it's allowing cross-pressure in your pipes. If you've ruled out other simple fixes like a worn-out washer in an older style faucet (less common in modern single-handle models), the cartridge is almost certainly the issue.
Gathering Your Tools and the Right Replacement Part
Success in this project hinges on preparation. Trying to improvise with the wrong tools can lead to stripped screws, damaged plumbing, and a lot of frustration. You don't need a truckload of equipment, but you do need the right few items. Essential tools include a Phillips head screwdriver, an adjustable wrench or a set of channel-lock pliers, and possibly a deep-set socket or a specific cartridge puller tool for stubborn models.
You'll also need some supplies for cleanup and protection: white vinegar for soaking mineral-clogged parts, a soft brush (an old toothbrush works perfectly), plumber's grease (a clear, non-petroleum lubricant), and some old towels or a small bucket to catch residual water. Don't forget a flashlight—it's dark inside that wall cavity.
The single most important item is the correct replacement cartridge. This is not a guesswork step. Once you've identified your brand, find the specific model number. This is often stamped on the cartridge itself, which you'll see after disassembly, or can be found in your shower valve's manual. If you don't have the manual, take your old cartridge directly to a plumbing supply store or a well-stocked home center. The experts there can match it for you. Buying online? Double-check the model compatibility listing.
Actionable Tip: Before you shut off the water, take a photo of your faucet handle and trim. This visual reference can be invaluable when reassembling everything later.
The Critical First Step: Shutting Off the Water
This step is non-negotiable. You must locate and turn off the water supply to your shower. For many homes, this means finding the main water shut-off valve for the entire house, which is less than ideal. A better, more targeted option is to look for individual shut-off valves. Check in the bathroom vanity cabinet, in the basement or crawlspace directly below the bathroom, or in a nearby access panel.
If you cannot find a local shut-off, you'll need to use the main valve. It's typically located where the main water line enters your home, often in a basement, garage, or utility closet. Turn it clockwise until it stops. Once the water is off, go to a faucet on the lowest level of your home and turn it on to relieve any remaining pressure in the lines. This prevents a surprise spray when you remove the cartridge.
The Step-by-Step Removal Process
Now, with your tools laid out and the water safely off, you can begin the hands-on work. Start by removing the shower handle. There's usually a small decorative cap covering a screw. Pry this off gently with a flathead screwdriver or a knife tip. Underneath, you'll find a screw. Remove it, and the handle should pull straight off. If it's stuck, avoid excessive force; a gentle wiggle or a few light taps with the handle of your screwdriver can break the mineral bond.
Next, remove the escutcheon plate (the decorative metal cover against the wall). It may simply pull off, or it might be held by screws. Once this is off, you'll see the cartridge housed inside the valve body. At this point, take another photo. Note how the cartridge is oriented—which way is "hot" and "cold" if it's labeled. This is crucial for installing the new one correctly.
Now, you need to extract the old cartridge. Some models are held in by a retaining clip, a U-shaped piece of metal. Use needle-nose pliers to carefully pull this clip out. Others use a threaded retaining nut; use your adjustable wrench to loosen it. Once the retainer is off, you should be able to pull the cartridge straight out. If it's been in place for 15 years, it might be cemented by minerals. This is where a cartridge puller tool (brand-specific) can be a lifesaver, preventing damage to the valve. As a last resort, you can gently rock it back and forth while pulling.
Actionable Tip: If the cartridge is mineral-crusted, soak it in white vinegar for 30 minutes after removal. This makes cleaning the valve seat inside the wall much easier and helps you inspect the old part.
Inspecting and Cleaning the Valve Body
With the cartridge out, don't rush to put the new one in. Shine your flashlight into the valve body. You'll see the ports where water enters. Use your soft brush and a rag to gently clean out any debris, sediment, or mineral scale. A clean valve seat ensures a perfect seal for your new cartridge. This is also the time to check for any cracks or damage inside the valve—though rare, if the valve body itself is damaged, you'll need to call a professional.
Installing the New Cartridge Correctly
This is where your preparation pays off. Take your new cartridge out of its packaging. Before you insert it, apply a thin coat of plumber's grease to all the rubber O-rings and seals. This isn't just lubrication; it protects the rubber, ensures a smooth insertion, and helps create a watertight seal. Do not use regular petroleum jelly or grease, as these can degrade the rubber over time.
Now, align the new cartridge exactly as the old one came out. Refer to your photo. There are usually tabs or notches that align with the valve body. Push it firmly and evenly into place until it seats fully. You should feel it settle in. If it feels like it's hitting a wall, don't force it—pull it out, realign, and try again. Forcing it can break the plastic tabs or misalign the seals.
Once the cartridge is seated, reinstall the retaining clip or nut. Make sure it's secure, but don't overtighten a threaded nut—snug is sufficient. Now, before you put the handle and trim back on, it's time for a critical test. Slowly turn your main water supply back on. With the shower handle still off, listen and look for any immediate, gushing leaks from the valve. A few drops as the lines refill are normal, but a steady stream means the cartridge isn't seated properly or the retainer isn't secure.
Actionable Tip: Perform this initial test with the trim still off. It's much easier to diagnose and fix a leak now than after everything is buttoned up.
Final Reassembly and Testing
Assuming your leak test was successful, you can finish the job. Slide the escutcheon plate back into position and secure it if needed. Then, place the handle back onto the stem of the cartridge. Make sure it's oriented correctly for "off" and "on" (usually, pushing down or turning clockwise turns it off). Insert and tighten the handle screw, and pop the decorative cap back on.
The moment of truth has arrived. Turn the shower on slowly. Let the water run for a full minute. Check for smooth operation through the full range of motion from cold to hot. Feel around the base of the handle and the escutcheon plate for any moisture. Most importantly, turn the shower off completely and wait. Listen. Watch the showerhead. That maddening drip should be gone. If it's not, the issue might be a slightly defective new cartridge (rare) or a different problem, like a worn showerhead washer.
Give yourself a pat on the back. You've just completed a repair that typically costs between $150 and $300 for a plumber to perform, and you've likely spent under $50 on the cartridge and any new tools. More than the savings, you've gained the confidence and knowledge that you can maintain an essential part of your home.
Actionable Tip: Keep the old cartridge and the model number of the new one in a ziplock bag in your utility drawer. When it eventually wears out again in 8-10 years, you'll know exactly what to buy and how to do it even faster.
When to Call a Professional
While this guide aims to empower you, it's equally important to recognize when a job is beyond a DIY fix. If, during disassembly, you discover significant corrosion on the valve body, broken pipes, or if you have an obscure, ancient valve brand with no available parts, it's time to call a licensed plumber. Similarly, if you live in an older home with galvanized steel pipes, the act of turning off an old valve might cause it to fail, creating a bigger problem.
If you follow all the steps and the leak persists even with a new cartridge correctly installed, the issue could be with the valve seat or another internal part of the shower valve that requires specialized tools to repair. There's no shame in calling for backup. A good professional will appreciate the diagnostic work you've already done, which can save them time and you money.
Remember, the goal is a safe, permanent fix. Knowing your limits is a sign of a savvy homeowner, not a defeated one. You've already learned the mechanics of your shower, which puts you in a far better position to communicate with a professional and understand the work they propose to do.
Actionable Tip: If you need to call a plumber, have the brand and, if possible, the model number of your shower valve ready. This information alone can shave significant time off their diagnostic visit.