Don't panic on the shoulder. Learn the practical, safe process to change a flat tire yourself and get back on the road with confidence.
- April 17, 2026
AceShowbiz - You know the sound. That sudden, jarring thump-thump-thump followed by a heavy drag on the steering wheel. Your stomach drops as you guide your car onto the shoulder, gravel crunching under the one now-flat wheel. It's not a matter of if this will happen to you, but when. The National Highway Traffic Safety Administration estimates tire-related issues cause approximately 11,000 crashes annually. Yet, a 2022 survey by the Tire Industry Association found that nearly 20% of drivers wouldn't know how to change a flat.
Being stranded is more than an inconvenience; it's a vulnerable position. Relying on a tow truck can mean a costly wait, and roadside assistance memberships have fine print about coverage areas and wait times. The real power isn't just in fixing the problem—it's in reclaiming your independence and safety. Knowing how to handle a flat tire transforms a potential crisis into a manageable, 20-minute task. Let's walk through exactly what to do, from that first ominous sound to tightening the last lug nut, so you can drive away with newfound confidence.
Before You Even Touch a Tool: The Critical Safety Protocol
Your first instinct might be to jump out and assess the damage. Fight it. The moments after a flat are the most dangerous. A staggering percentage of roadside fatalities occur because drivers are struck while outside their vehicles. Your primary goal is to make yourself and the situation as visible and contained as possible.
Activate your hazard lights immediately. This is your universal signal for distress. Don't stop just anywhere; aim for a wide, flat, and firm section of the shoulder. If you're on a curve or a narrow bridge, drive slowly on the flat rim (it will be loud and damaging, but safer) until you find a more open spot. Ideally, put as much distance between your car and active traffic lanes as possible.
Once parked, apply the parking brake firmly. This prevents the car from rolling, especially when you jack it up. Before you exit, put on a high-visibility vest or brightly colored jacket if you have one. Every driver has that "kit" buried in their trunk—now's the time to use it. Grab the reflective warning triangle and place it at least 50-100 feet behind your car on the shoulder. This gives approaching drivers a crucial early warning.
Actionable Takeaway: Your pre-change checklist is non-negotiable: 1) Hazards ON, 2) Park on firm, level ground, 3) Parking brake ENGAGED, 4) High-visibility gear ON, 5) Warning triangle DEPLOYED. Only then should you retrieve your spare tire and jack.
What Your Car's Manual Knows That You Don't
While the basic principles are universal, your specific vehicle has quirks. The location of the jack points—the reinforced metal seams on the frame designed to bear the car's weight—is critical. Jacking on a plastic rocker panel or a suspension component can cause thousands in damage and is incredibly unsafe. Your owner's manual has the exact diagram.
It also tells you the recommended tire pressure for your compact spare (often a shocking 60 PSI) and where your specific car's jack and tire iron are stowed. In many modern cars, the spare is under the trunk floor, but in some SUVs, it's mounted underneath the vehicle. Five minutes of familiarization in your driveway at home saves frantic searching on a dark, rainy highway.
Gathering Your Arsenal: The Tools You Actually Need
Pop your trunk and locate the spare tire compartment. A full-size spare is a luxury these days. What you'll likely find is a compact temporary spare, often called a "donut." Recognize its limitations: it's smaller, lighter, and has prominent yellow warning labels. It's designed for short distances (usually under 50 miles) and reduced speeds (often max 50 mph). It's your ticket home, not a permanent fix.
Alongside the spare, you should find a jack and a tire iron (lug wrench). Test the tire iron now. Many are cheaply made and can bend or strip the lug nuts if they're overly tight. A pro tip is to invest in a quality, cross-shaped tire iron or a breaker bar with the correct socket size. The added leverage is a game-changer, especially if the last person to rotate your tires used an impact wrench at the shop.
Don't forget a pair of sturdy gloves. Lug nuts are dirty, and the wheel well collects grime, brake dust, and sharp edges. Gloves protect your hands and give you a better grip. A small flashlight or using your phone's light is also essential if it's getting dark. Lay all these items out neatly near the flat tire before you begin.
Actionable Takeaway: Upgrade your factory tire iron to a more robust tool and keep a pair of mechanic's gloves and a headlamp in your spare tire kit. This small investment makes the physical work far easier and cleaner.
The Step-by-Step Swap: Lifting, Loosening, and Mounting
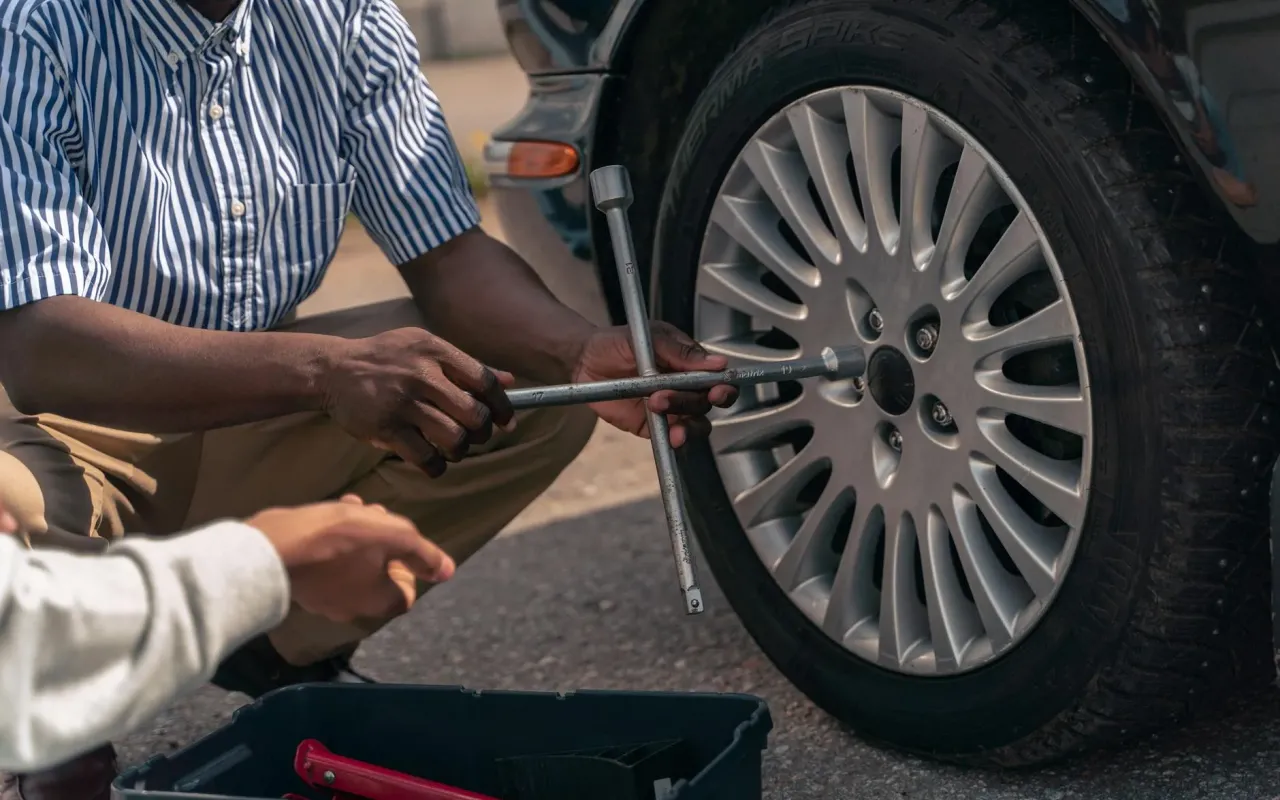
Now for the main event. Start by loosening the lug nuts on the flat tire while the car is still firmly on the ground. This is the most common mistake people make. Once the car is jacked up, the wheel will spin freely, making it nearly impossible to break the nuts loose. Use your foot or your body weight on the tire iron, turning counterclockwise. You might need to really lean into it. Just break their resistance; don't remove them completely yet.
Next, consult your manual and position the jack under the designated metal jack point. Begin cranking slowly and steadily. Watch the car as it rises. It will feel unstable—that's normal. Jack it until the flat tire is about six inches clear of the ground. You want enough room to remove the flat and fit the fuller spare.
Now you can fully unscrew and remove the lug nuts. Place them in your hubcap or a secure spot where they won't roll into the road. Pull the flat tire straight off the wheel studs. It might be heavy and stuck from corrosion. A firm pull or a tap with your foot on the rubber should free it. Roll it out of the way behind your vehicle.
Retrieve your spare and line up the holes with the wheel studs. Lift it onto the studs—this is the heaviest part. Push it on as far as you can by hand. Then, screw the lug nuts back on by hand, turning clockwise. Get them all started before using any tool. This ensures the wheel is seated evenly.
The Crucial Torque Sequence
This isn't just about tightening; it's about tightening in the right order. Using your fingers, snug the lug nuts in a star or crisscross pattern. If you imagine your wheel as a clock, tighten the nut at 12 o'clock, then 6, then 3, then 9, and so on. This pulls the wheel evenly against the brake rotor and prevents warping. Once all are hand-tight, use your tire iron to give each one a firm turn in the same star pattern. Do not fully torque them yet.
Lowering and Finalizing: The Details That Matter
Carefully lower the car slowly with the jack until the spare tire just touches the ground and begins to bear a little weight. This stabilizes the wheel so it won't spin while you apply the final torque. Now, using your tire iron and the star pattern again, tighten the lug nuts as firmly as you can. Put your body weight into it. The goal is to get them "good and tight."
Finish lowering the car completely and remove the jack. Do a final pass on the lug nuts, tightening them one more time with the car's full weight on them. This is your last chance to ensure they are secure. A loose wheel is catastrophic. Stow your flat tire, jack, and tools back in the trunk. Don't forget to retrieve your warning triangle from down the road.
Before you drive off, take a moment. Your compact spare is visibly smaller. Your car's handling will feel different—more sensitive and less stable. Adjust your driving immediately. Drive below the speed limit printed on the spare's sidewall, avoid hard braking and sharp turns, and get to a tire shop as soon as possible. The spare is your emergency exit, not a replacement tire.
Actionable Takeaway: The tightening sequence is non-negotiable. Always use a star pattern, twice: once when the tire is barely on the ground, and a final time with the car fully lowered. This ensures a safe, even mount.
When the Plan Hits a Snag: Troubleshooting Common Issues
What if the lug nuts won't budge? This is where that upgraded tire iron pays off. If you're struggling, try placing the iron so it's horizontal and stepping on the end carefully, using your full weight. You can also try tapping the end of the iron with a rock or the spare tire to shock the nut loose. As a last resort, penetrating oil like WD-40 sprayed on the nuts and given a few minutes to work can help break corrosion.
What if the car is too low to fit the jack? Use the flat tire as a base. Before you jack, slide the flat tire under the car's frame rail, next to the jack point. If the jack slips or fails, the car will fall onto the rubber tire, not the ground, potentially preventing injury or further damage. It's a clever safety backup.
What if your spare is also flat? This is a sobering reality check. This is why you should check your spare's pressure every time you check your other tires (you are checking them monthly, right?). If it's flat, your only safe option is roadside assistance. It underscores that preparation isn't just about the act of changing, but maintaining the tools for the change.
Beyond the Fix: Turning a Hassle Into a Habit
You're back on the road. The adrenaline fades. Now, build on this experience. Your first stop should be a tire professional to repair or replace your flat. Most punctures in the tread are repairable for a modest cost. They will also properly torque your lug nuts with a calibrated wrench—ask them to set it to your vehicle's specification, usually between 80-100 foot-pounds.
Use this event as a catalyst for better car care. Make a monthly ritual: check all tire pressures (including the spare) when the tires are cold, look for nails or cracks, and monitor tread depth with the penny test. A well-maintained tire is far less likely to fail catastrophically. Also, consider adding a small roadside kit to your trunk: a heavier-duty jack, a real tire pressure gauge, and perhaps a portable air compressor.
The feeling of changing your first flat tire is one of genuine capability. It shifts your mindset from being a passive passenger in your vehicle to being its active manager. The road is full of uncertainties, but your ability to handle this common one is now a certainty. You've not just swapped rubber and metal; you've installed a layer of resilience that travels with you every mile ahead.