Ultimate DIY Raised Garden Bed Plans: A step-by-step guide to help you create a thriving garden with practical and easy-to-follow instructions.
- November 9, 2024
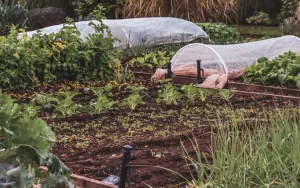
AceShowbiz - Creating a raised garden bed is one of the best ways to ensure you have a thriving garden. These garden beds offer numerous benefits, including improved soil drainage, better control over the soil quality, and easier access for gardening tasks. In this comprehensive guide, we will walk you through the ultimate DIY raised garden bed plans, ensuring you have all the information and confidence needed to create your own piece of gardening heaven.
Advantages of Raised Garden Beds
Before diving into the step-by-step plans, it's essential to understand why raised garden beds are so beneficial. These advantages include:
- Improved Soil Quality: You have full control over the soil mix, ensuring it is rich in nutrients and well-drained.
- Better Drainage: Raised beds generally have better drainage, reducing the risks of waterlogging.
- Pest Control: Elevated positions often make it harder for pests to access your plants.
- Work Convenience: Easier access for planting, weeding, and harvesting, reducing strain on your back and knees.
Materials Needed for DIY Raised Garden Bed Plans
To get started, gather the following materials:
- Wooden planks (cedar or redwood are excellent choices due to their durability and resistance to rot)
- Wood screws or nails
- Measuring tape
- Drill and drill bits
- Level
- Square and pencil
- Wheelbarrow or cart (for moving soil)
- Soil mix (a blend of topsoil, compost, and other organic materials)
- Mulch (optional)
Step-by-Step Plans for Building Your Raised Garden Bed
Step 1: Choose the Location
Select a sunny location for your raised bed. Most vegetable plants require 6-8 hours of direct sunlight per day.
Step 2: Determine the Size
Common dimensions for a raised garden bed are 4 feet wide (to allow for easy access from both sides) and 6-8 feet long. Height can vary from 6-24 inches, depending on the plants you're growing.
Step 3: Prepare the Site
Clear the area of grass, weeds, and rocks. You can also lay down a weed barrier fabric to prevent future weed growth.
Step 4: Cut the Wood
Measure and cut your wooden planks according to your desired dimensions. For a 4x8 bed, you’ll need two 4-foot planks and two 8-foot planks.
Step 5: Assemble the Frame
Using your screws or nails, attach the planks at the corners to form a rectangle or square. Ensure that the corners are square and the bed is level.
Step 6: Secure and Level the Bed
Position the bed in the desired location. Check for levelness and make any necessary adjustments by digging under the frame or adding soil.
Step 7: Fill with Soil
Fill your raised garden bed with a high-quality soil mix. Aim for a mix that includes compost, topsoil, and other organic materials. These elements will provide essential nutrients and excellent drainage for your plants.
Step 8: Plant Your Garden
With the bed prepared, you’re ready to plant your garden. Follow planting guidelines for each type of plant, ensuring proper spacing and depth.
Maintenance Tips for Your Raised Garden Bed
Watering
Raised beds often require more frequent watering than traditional gardens due to improved drainage. Water deeply to encourage root growth, and consider using a drip irrigation system for convenience and efficiency.
Mulching
Adding mulch helps retain soil moisture and suppress weeds. Organic mulches like straw, wood chips, or grass clippings are excellent choices.
Fertilizing
Regularly fertilize your garden with organic fertilizers, compost, or well-rotted manure. This practice will maintain soil fertility and promote healthy plant growth.
Pest Control
Monitor your plants regularly for signs of pests. Use natural pest control methods such as neem oil, insecticidal soaps, and introducing beneficial insects.
Conclusion: Start Your Thriving Garden Today
Raised garden beds offer a fantastic way to cultivate a thriving garden with greater ease and efficiency. By following these DIY raised garden bed plans, you can create a beautiful and productive gardening space that meets your needs. Remember to choose the right location, use quality materials, and maintain your garden with proper watering, mulching, and fertilizing practices. Happy gardening!