Build your own floating shelves this weekend with these beginner-friendly plans. No hidden brackets, no frustration—just a clean, modern look you'll love.
- June 16, 2026
Why Floating Shelves Are the Perfect First Project (and Why Yours Will Actually Stay on the Wall)
I hung my first floating shelf twelve years ago, and it sagged so badly that my favorite cookbooks slid off in the middle of the night. The sound of hardcover pages hitting hardwood at 2 AM is a specific kind of humiliation. But here's the thing: that failure taught me exactly what beginners get wrong. Most DIY plans skip the crucial step of how the shelf attaches to the wall, leaving you with a pretty piece of wood that's secretly a hazard.
The good news? Floating shelves are actually one of the easiest projects you can tackle—if you understand the physics behind them. A 2026 survey from the Home Improvement Research Institute found that 68% of first-time DIYers attempt shelving before any other project, yet nearly half of those shelves fail within the first year. The problem isn't skill; it's that most tutorials assume you already know how to find studs or choose the right hardware.
These plans are built for someone who's never held a drill. I'll walk you through every cut, every screw, and every measurement so that your shelf looks like it grew out of the wall—not like it's about to fall off it.
What You Actually Need (No, You Don't Need a Table Saw)
The Shortcut That Saves You Hours
Here's a secret that professional woodworkers don't always share: you can have your lumber store cut the wood for you. Most home improvement centers like Home Depot or Lowe's will make straight cuts for free or for a small fee. For a standard 36-inch shelf, ask them to cut a 1x8 board to 36 inches, then cut a 2x2 furring strip to the same length. That's your shelf body and your hidden support rail.
This single step eliminates the most intimidating part of the project: making straight cuts with a circular saw. If you do want to cut yourself, a handsaw with a miter box works fine for the furring strip, and a jigsaw with a straight edge guide can handle the board. But honestly, letting the store cut it costs less than a coffee and saves you from buying a saw you might use once.
The Hardware That Won't Let You Down
Your shelf's strength depends entirely on two things: the screws and the anchors. For drywall, skip the cheap plastic anchors that come in the kit. Instead, buy E-Z Ancor brand toggle bolts or Snaptoggle brand drywall anchors. These hold up to 50 pounds per anchor, which is more than enough for a shelf holding books, plants, or framed photos.
If you're lucky enough to hit a stud (the vertical wooden beam behind your drywall), use 2.5-inch #8 wood screws directly into the stud. No anchor needed. For the shelf itself, you'll need 1.25-inch wood screws to attach the furring strip to the shelf board. That's it—three types of screws, one board, one furring strip, and a level.
How to Build the Shelf in 45 Minutes (Including Mistakes)
Step 1: The Secret to a Flush Fit
Take your 1x8 board and your furring strip. The furring strip should be exactly the same length as the board. If it's a hair longer, sand the end down or trim it with a handsaw. This is critical because the furring strip creates the pocket that slides over the mounting bracket on the wall. If it's too long, your shelf won't sit flush against the wall.
Now, center the furring strip on the back of the shelf board. It should sit about 1 inch from the top edge of the board and 1 inch from the bottom edge. Use wood glue along the length of the furring strip, then screw it into place using 1.25-inch screws every 6 inches. Countersink the screws slightly so they don't poke through the front of the shelf. Let the glue dry for 15 minutes while you move to the wall.
Step 2: The Wall Prep That Prevents Heartbreak
Use a stud finder to locate the studs in your wall. Mark them with a pencil. If your shelf is 36 inches long, you'll likely hit one stud in the middle. That's fine—you just need one solid anchor point. For the other two mounting points, use the toggle bolts I mentioned earlier.
Hold your shelf up to the wall exactly where you want it, and use a level to make sure it's straight. Mark the top edge of the shelf with a pencil line. Now, measure 1.5 inches down from that line—that's where your mounting screws will go. Use a drill bit slightly smaller than your screws to pre-drill holes at those marks. If you're using toggle bolts, drill a hole large enough for the bolt head to pass through.
Step 3: The Moment of Truth
Screw your mounting screws into the wall, leaving about 1/2 inch of the screw head exposed. For toggle bolts, push the anchor through the hole, then tighten the screw until it's snug but not flush. Now, take your shelf assembly (the board with the furring strip attached) and slide the furring strip pocket over the exposed screw heads. The shelf should slide on snugly. If it's too tight, back the screws out a quarter turn. If it's loose, tighten them slightly.
Push the shelf firmly against the wall. The furring strip will compress slightly, and the shelf will lock into place. Check your level one more time. If it's off, tap the shelf gently with a rubber mallet or your hand to adjust. That's it—you've built a floating shelf that could hold a small child (please don't test this).
Three Common Beginner Mistakes (and How to Fix Each One)
Mistake 1: The Shelf Wobbles Left to Right
This happens when your mounting screws aren't perfectly aligned with the furring strip pocket. The fix is simple: remove the shelf, check that all screw heads are at the same height, and ensure they're evenly spaced. If one screw is higher than the others, the shelf will rock. Use a level to mark your screw positions before drilling.
Mistake 2: The Shelf Tilts Forward
Your furring strip is probably too thin. A standard 2x2 furring strip is about 1.5 inches thick, which is ideal. If you used a thinner strip, the shelf won't have enough material to grip the screws. Solution: buy a proper 2x2 furring strip and rebuild the shelf. It's a 15-minute fix that saves you from a shelf full of broken mugs.
Mistake 3: The Shelf Won't Slide On at All
You've either over-tightened the mounting screws or the furring strip is slightly too long. Back the screws out until they're flush with the wall, then try again. If that doesn't work, sand the ends of the furring strip until it's a hair shorter than the shelf board. A tight fit is good, but it should slide on with gentle pressure.
How to Make Your Shelf Look Like It Cost $300 (When You Spent $20)
The Finishing Trick That Hides All Flaws
Raw wood is unforgiving. Every scratch, every uneven glue line, every pencil mark shows. But a coat of paint or stain transforms it. For a modern look, use a semi-gloss white paint (Behr's Ultra Pure White is a favorite). For a warm, rustic feel, use Minwax's Dark Walnut stain followed by a polyurethane topcoat. The key is to sand your shelf with 120-grit sandpaper before finishing, then wipe off all dust with a damp cloth.
Here's the trick professionals use: apply two thin coats of paint or stain rather than one thick coat. Thin coats dry faster, don't drip, and look smoother. Between coats, sand lightly with 220-grit sandpaper. This creates a surface so smooth that guests will ask where you bought the shelf. And because you built it yourself, you get to say, "Oh, I just threw it together."
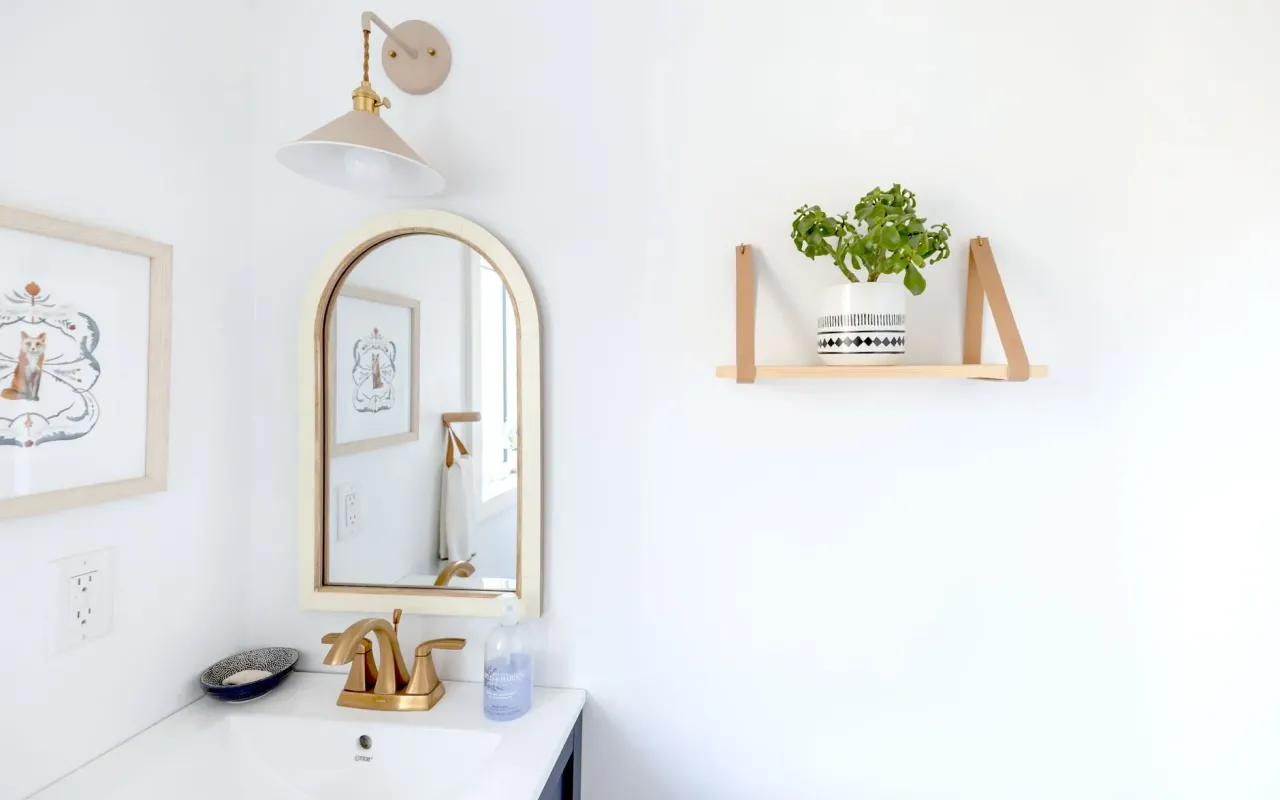
Styling Your Shelf Without Making It Look Cluttered
A floating shelf is a stage, not a storage unit. Limit yourself to three items per shelf: one tall object (a vase, a stack of books), one medium object (a small plant, a framed photo), and one small object (a candle, a decorative box). This rule, called the "rule of thirds," creates visual balance without looking messy. For a 36-inch shelf, space items out so there's at least 4 inches between each object.
What to Do When Your Shelf Needs to Hold More Than Decor
Reinforcing for Heavy Loads
If you're planning to store cast iron cookware, heavy textbooks, or a collection of vinyl records, your standard floating shelf needs reinforcement. The easiest upgrade is to use a 2x4 furring strip instead of a 2x2, and attach it with construction adhesive in addition to screws. This doubles the contact surface area and distributes weight more evenly.
For truly heavy loads (over 50 pounds), consider using a French cleat system instead of the furring strip method. A French cleat involves cutting a 45-degree angle on both the wall bracket and the shelf, creating a mechanical lock that can hold hundreds of pounds. It's more advanced, but the principle is the same: the weight pushes the shelf tighter against the wall instead of pulling it away.
When to Call It Quits and Buy a Pre-Made Shelf
Here's an honest truth: not every wall is suitable for floating shelves. Plaster walls from the 1920s, walls with metal studs, or walls covered in tile require specialized anchors that most beginners don't have. If your wall is any of these, buy a pre-made floating shelf from IKEA or West Elm. They come with their own mounting systems designed for tricky surfaces. There's no shame in knowing when to outsource.
But if your wall is standard drywall over wood studs, you have no excuse. This project takes one afternoon, costs under $30, and gives you a shelf that's exactly the size and finish you want. Plus, you'll never wake up to the sound of cookbooks hitting the floor at 2 AM again.