Ditch the flat-pack. Learn how to strip, sand, and refinish a thrifted dresser into a showstopper piece that costs less than a night out.
- April 28, 2026
Why You Should Stop Looking at New Furniture and Start Looking at Trash
I walked past the same beat-up oak dresser on my neighbor's curb for three days. It was water-stained, the top drawer was hanging by a single screw, and someone had painted a sad beige over the original hardware. On day four, I threw it in my trunk. Two weekends later, that same dresser sits in my living room, and people genuinely ask me where I bought it. That's the magic of DIY furniture restoration. You don't need a workshop or a thousand dollars. You need patience, a few specific tools, and the willingness to get sawdust in your hair.
The furniture industry is a dumpster fire of engineered wood and planned obsolescence. A particleboard bookshelf from a big-box store costs $150 and disintegrates during your second move. Meanwhile, a solid wood dresser from 1970 can be found on Facebook Marketplace for $40. It will outlive your grandchildren if you treat it right. Restoration isn't just about saving money—though you will save a ton. It's about rescuing quality from the landfill and creating a piece that actually has a story. And no, you don't need to be a master carpenter. You just need to know where to start.
Actionable takeaway: Before you buy anything new, spend 30 minutes scrolling local listings or thrift stores. Look for solid wood pieces—check by pulling out a drawer. If the sides are dovetailed, you've hit gold. If it smells like a basement, that's fixable. If it's made of MDF, walk away.
What You Actually Need to Get Started (And What You Can Skip)
I've seen tutorials that list forty-seven tools for a simple refinishing job. That's nonsense. You need five core items: a chemical stripper, a putty knife, sandpaper in three grits (80, 120, 220), a good paintbrush, and a finish of your choice. That's it. You don't need a fancy orbital sander—your arm works fine for small pieces. You don't need a spray gun—a high-density foam roller gives a glass-smooth paint finish. The goal is to start, not to perfect your tool collection.
One thing you should never skip is PPE. Chemical strippers are potent, and the dust from sanding old paint can contain lead if you're working on a pre-1978 piece. A pair of nitrile gloves, a respirator (not a dust mask), and safety glasses cost under $30 total. Your lungs are worth more than a thrifted armoire. I learned this the hard way after a nasty chemical burn on my forearm from being lazy with gloves. Trust me, the extra five seconds to gear up is worth it.
Actionable takeaway: Buy a small can of Citristrip for your first project. It's less toxic and smells like oranges instead of a chemistry lab. It takes a bit longer to work, but it's far more forgiving for beginners. Pair it with a plastic scraper, not a metal one, to avoid gouging the wood.
The One Tool That Changes Everything
If you want to upgrade from "surviving" to "thriving" in your restoration game, get a carbide scraper. It's a flat blade that you pull toward you to remove finish. It sounds primitive, but it removes paint and varnish faster than sandpaper and leaves the wood surface smooth. It costs about $12. I use mine on every single project now, and it cuts my stripping time in half. You sharpen it with a file, and it lasts for years.
How to Strip a Dresser Without Losing Your Sanity
Here's where most people mess up. They glob stripper on a surface, let it sit for ten minutes, and then panic-scrape while the finish turns into a sticky mess. The trick is patience and a plastic drop cloth. Apply a thick, even layer of stripper with a cheap chip brush. Don't spread it thin like butter—it needs to be about 1/8 inch thick. Then cover it with plastic wrap or a garbage bag. This keeps the stripper from drying out, allowing it to penetrate multiple layers of old paint or varnish. Wait 45 minutes to an hour. You'll know it's ready when the finish looks wrinkled and bubbly.
Scrape with the grain using your plastic putty knife. The finish should come off like soft butter. If it's still sticky, give it more time. If it's dry and flaky, you didn't apply enough. This is not a race. I once spent an entire Saturday stripping a single sideboard because the original owner had painted it three times. The result was worth every minute—the wood underneath was gorgeous walnut. You can't rush quality.
Actionable takeaway: Work in small sections. Don't strip the entire dresser at once. Do the top, then the sides, then the drawers. This keeps the stripper active and prevents you from getting overwhelmed. Use a plastic scraper for the flat surfaces and a stiff nylon brush for grooves and details.
Sanding: The Difference Between Looking Good and Looking Like a DIY
Sanding is where the magic happens, but it's also where beginners destroy their pieces. The goal is not to remove all the wood. The goal is to smooth the surface and prepare it for finish. Start with 80-grit sandpaper to knock down any rough spots or leftover finish residue. Then move to 120-grit to remove the scratches from the 80-grit. Finally, use 220-grit for a silky-smooth finish. Always sand with the grain. Sanding against the grain leaves scratches that stain will amplify, and you'll hate yourself for it.
If you're using a chemical stripper, you might be tempted to skip sanding entirely. Don't. Stripper raises the wood grain, leaving a fuzzy texture. A quick sanding with 220-grit will fix that. For painted finishes, you need to sand between coats of paint to get that professional, smooth surface. I use a sanding sponge for this—it conforms to curves and edges better than flat paper. And please, wipe down the piece with a tack cloth after sanding. Dust particles under your finish will look like freckles on a bad skin day.
Actionable takeaway: For detailed areas like turned legs or carved details, use a sanding mop. It looks like a brush made of sandpaper strips. It gets into every crevice without you having to fold paper into tiny shapes. It's under $10 on Amazon and saves hours of frustration.
The Secret to a Flawless Painted Finish
If you're painting instead of staining, the secret is the primer. Use a shellac-based primer like Zinsser BIN. It blocks stains, tannins from oak, and even smells. It dries in 30 minutes. I've used water-based primers that required three coats to cover a dark stain. BIN does it in one. Then use a high-quality cabinet paint like Benjamin Moore Advance or Sherwin-Williams Emerald. These self-level, meaning brush strokes disappear as they dry. A cheap paint will leave ridges that catch the light, and your piece will scream "I'm a DIY project."
Choosing a Finish That Actually Lasts (Not Just Looks Pretty)
This is the part that gets overlooked. You've stripped, sanded, and painted. Then you grab a random can of polyurethane and slather it on. Two months later, the top is sticky, or the paint is chipping. The finish you choose dictates how the piece will hold up to daily life. For a coffee table or a desk that gets heavy use, use a water-based polyurethane. It dries clear, doesn't yellow over time, and is incredibly durable. I finished a dining table with it three years ago, and it still looks new despite weekly spills and a toddler's crayon attacks.
For painted pieces, skip the polyurethane. Paint is already a finish. Adding a topcoat on top of paint can cause yellowing or adhesion issues. Instead, use a furniture wax like Annie Sloan Soft Wax. It adds a subtle sheen and protects the paint from scratches. Apply it with a lint-free cloth, let it sit for 15 minutes, then buff it off. It's not as durable as poly, but it's repairable—if you scratch it, you just re-wax that spot. For a dresser that won't see heavy abuse, wax is perfect. For a nightstand that holds a sweating glass of water every night, use poly.
Actionable takeaway: Do a test patch on the underside of the piece before committing to a finish. Apply your stain or paint, then your topcoat. Let it cure for 24 hours. Then scratch it with a key. If it flakes, you need a different product. This saves you from ruining the visible surface.
Replacing Hardware: The $10 Upgrade That Transforms Everything
I've seen people spend 30 hours refinishing a dresser and then leave the original, tarnished brass knobs on it. It's like wearing a tuxedo with sneakers. Hardware is the jewelry of your furniture. New pulls and knobs can completely change the style. For a mid-century modern look, go with brass cup pulls or angled T-bar handles. For something farmhouse, use black metal bin pulls. For a sleek, contemporary feel, try bar pulls in brushed nickel. Measure the center-to-center distance between the existing screw holes before you buy anything. Nothing is more frustrating than getting a set of gorgeous handles that don't fit.
If you want to keep the original hardware but it's tarnished, you can restore it. Soak brass or chrome pulls in a mixture of hot water and dish soap for an hour. Scrub with a toothbrush. For stubborn tarnish, use a metal polish like Brasso. For painted hardware, you can strip the paint with a small brush and acetone. I once restored a set of 1950s bakelite knobs that were covered in layers of white paint. Underneath, they were a beautiful amber color. They became the entire focal point of the piece. Don't throw away old hardware until you've tried to clean it.
Actionable takeaway: If you're replacing hardware, fill the old screw holes with wood filler and sand them smooth. Then drill new holes for your new pulls. This looks professional and prevents the piece from looking like it has acne scars. Use a template—you can buy a plastic one at any hardware store for $5.
How to Maintain Your Restored Piece So It Lasts Another 50 Years
You've done the work. Now don't ruin it. The biggest enemy of restored furniture is direct sunlight. UV rays will bleach stains and fade paint within months. Keep your piece out of south-facing windows, or use UV-blocking window film. The second enemy is moisture. Never set a wet glass directly on a wood surface. Use coasters. For painted pieces, wipe spills immediately with a damp cloth—don't let water sit. For stained and polyurethaned surfaces, use a furniture polish made from beeswax and mineral oil once a year. It replenishes the wood's natural oils and keeps the finish looking rich.
One thing I do with every piece I restore is attach felt pads to the bottom of the legs. This prevents scratches on your floors and makes the piece easier to move. I also add drawer liners to protect the interior from dust and spills. Cedar liners are a great option—they repel moths and smell wonderful. And if you ever get a scratch on a stained piece, don't panic. Rub a walnut meat over the scratch. The natural oils will darken the wood and hide the damage. It sounds ridiculous, but it works every time.
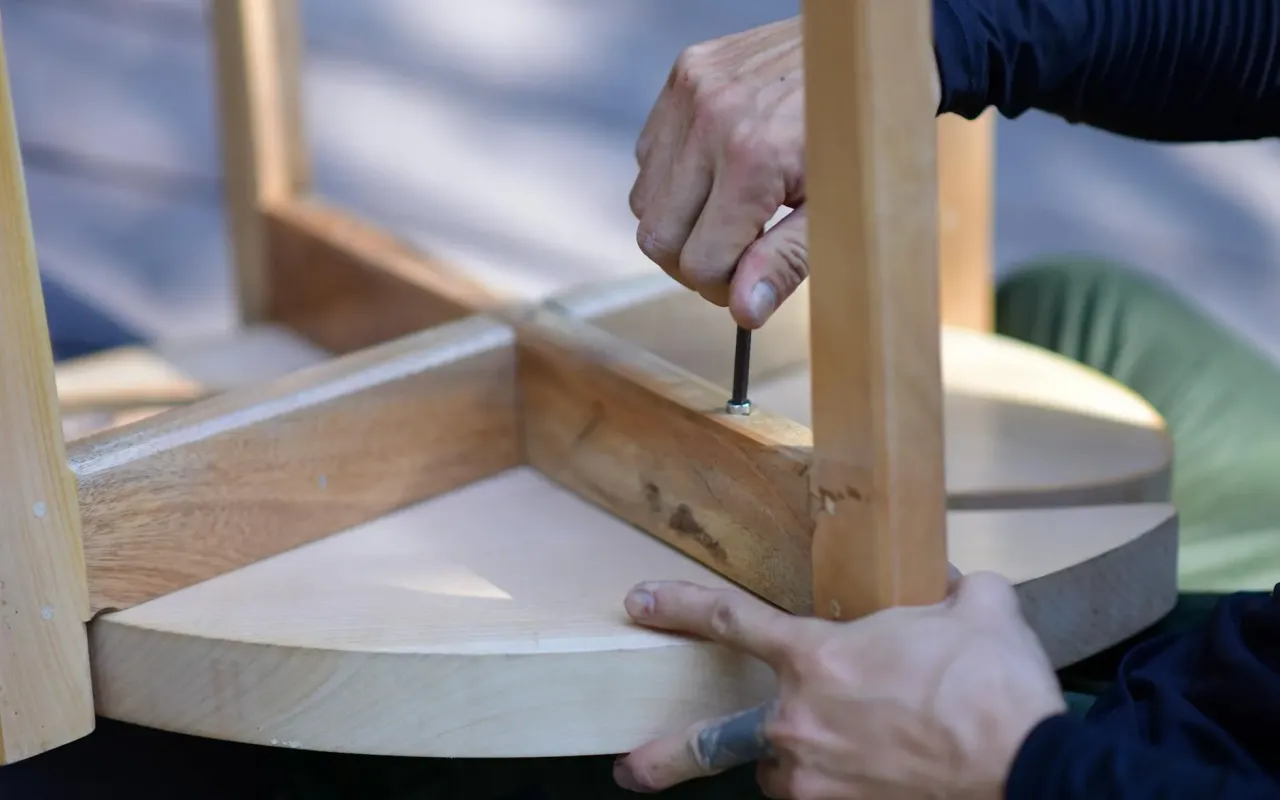
Actionable takeaway: Once a year, tighten all the screws on your furniture. Wood expands and contracts with humidity, and screws can loosen over time. A loose screw can strip the hole and ruin the piece. If a screw hole is stripped, fill it with a wooden toothpick coated in wood glue, break it off flush, and then re-screw. It's a five-minute fix that saves a drawer from falling off.
Restoring furniture isn't just about saving a piece of wood. It's about reclaiming your space from the tyranny of disposable consumerism. Every time you walk past that dresser in your hallway, you'll remember the afternoon you spent scraping and sanding. You'll know the grain of the wood, the weight of the drawers, the smell of the finish. That piece is yours in a way no store-bought item can ever be. And when someone asks where you got it, you'll smile and say, "I found it on the curb."