Learn how to turn a shirt into a dress with our step-by-step DIY guide. Perfect for fashion enthusiasts looking to upcycle their wardrobe.
- August 25, 2024
AceShowbiz - If you're a fashion enthusiast looking for creative ways to upcycle your wardrobe, learning how to turn a shirt into a dress can be both a fun and rewarding project. This step-by-step guide provides all the detailed instructions you need to transform an old, oversized shirt into a chic, stylish dress that's perfect for any occasion.
Why Upcycle Your Old Shirts?
Upcycling not only allows you to breathe new life into old clothes but also contributes to sustainable fashion practices. Here are some reasons to consider upcycling:
- Environmental Impact: Reduces textile waste in landfills.
- Cost-Effective: Saves money by creating new garments from existing ones.
- Unique Style: Enables you to design custom pieces that reflect your personal style.
Materials Needed
Before you start, make sure you have the following materials ready:
- One oversized button-up shirt
- Measuring tape
- Fabric scissors
- Sewing machine or needle and thread
- Pins
- Iron
- Chalk or fabric marker
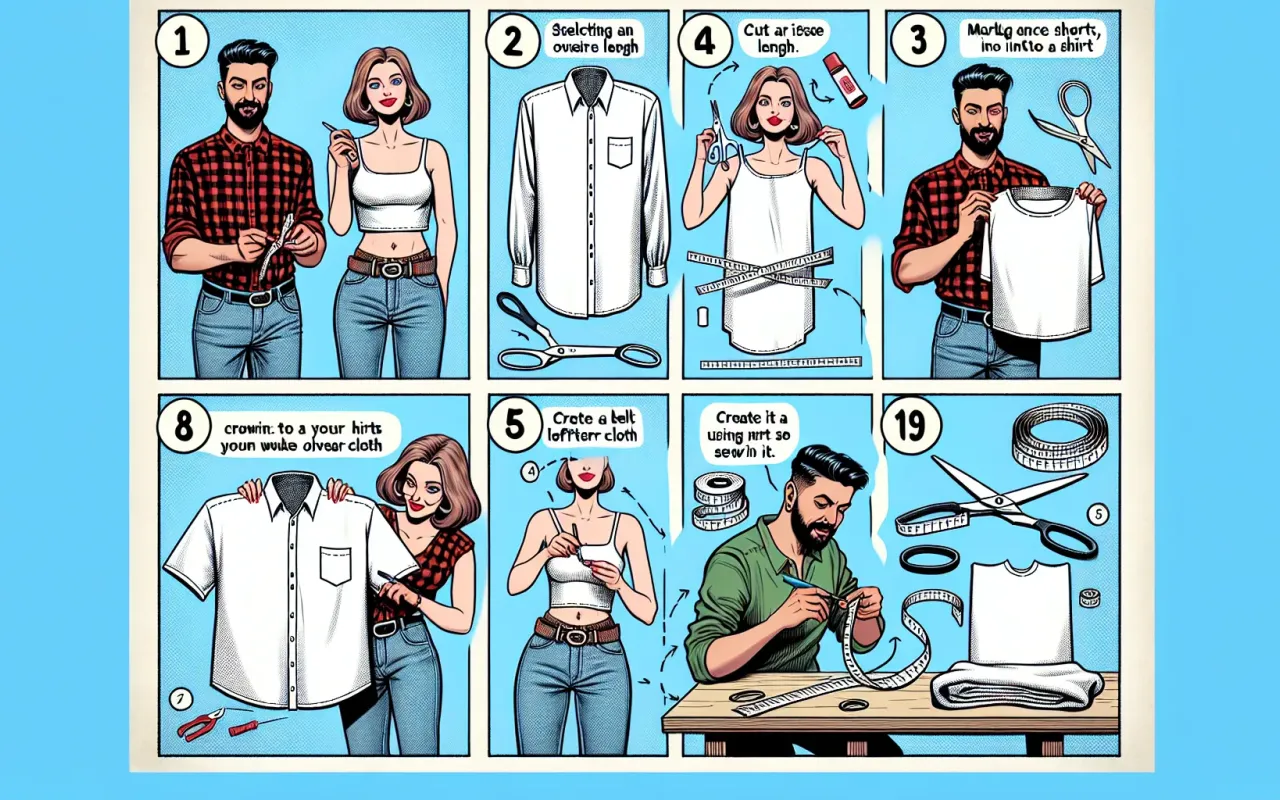
Step-by-Step Guide on How to Turn a Shirt into a Dress
Step 1: Choose the Right Shirt
Start by selecting an oversized button-up shirt. The larger the shirt, the more fabric you'll have to work with, which gives you more flexibility in design. Ensure the shirt is in good condition, without any stains or tears.
Step 2: Measure Your Body
Using a measuring tape, take the following measurements:
- Bust: Measure around the fullest part of your chest.
- Waist: Measure around the smallest part of your waist.
- Hips: Measure around the fullest part of your hips.
- Length: Decide how long you want the dress to be and measure from your shoulder to your desired length.
Step 3: Cut the Shirt
Lay the shirt flat on a cutting surface. Use chalk or a fabric marker to outline the new shape of your dress based on your measurements. Ensure you leave an extra 1 inch (2.5 cm) for seam allowances. Carefully cut along these lines, removing any unnecessary fabric.
Step 4: Create the Bodice
To form the bodice, tailor the top section of the shirt to fit your bust and waist measurements. Pin the sides of the shirt together, and then sew along the pinned lines. Ensure the fit is snug but not too tight.
Step 5: Adjust the Skirt
If the shirt is long enough, you can use the remaining fabric to form the skirt of the dress. Pin the sides to fit your hips comfortably and sew along the pinned lines. If additional length is needed, consider adding a gathered skirt section made from another piece of fabric or another shirt.
Step 6: Hem the Edges
To give your dress a polished look, hem the bottom edge of the skirt and the armholes. Fold the edges over by 1 inch (2.5 cm), pin them in place, and then sew a straight stitch along the folded edge. Iron the hems to ensure they lie flat.
Step 7: Add Finishing Touches
Check that all seams are secure and make any necessary adjustments to ensure a perfect fit. You can also add decorative elements such as lace trim, pockets, or buttons to personalize your new dress further.
Caring for Your Upcycled Dress
To keep your upcycled dress looking its best, follow these care instructions:
- Wash the dress in cold water to prevent shrinking.
- Hang dry or lay flat to avoid stretching the fabric.
- Iron on a low setting if needed, avoiding any delicate additions like lace or buttons.
Conclusion
Learning how to turn a shirt into a dress is a fantastic way to experiment with fashion while promoting sustainability. By following this step-by-step DIY guide, you can create a unique and stylish dress that reflects your personal taste, all while making a positive impact on the environment. Grab an old shirt, unleash your creativity, and start transforming your wardrobe today!