Learn how to build DIY garden irrigation systems with this step-by-step guide. Perfect for beginners, ensuring your garden stays hydrated and healthy.
- November 17, 2024
Keeping your garden properly hydrated is essential for maintaining healthy and vibrant plants. Whether you have a small vegetable garden or an extensive flower bed, an efficient irrigation system can save you time, money, and effort. This step-by-step guide will walk you through building DIY garden irrigation systems, perfect for beginners.
Why Install a DIY Garden Irrigation System?
DIY garden irrigation systems offer several benefits, including:
- Saving water by delivering it directly to plant roots.
- Reducing water bills with efficient water use.
- Preventing over or under-watering, leading to healthier plants.
- Saving time by automating the watering process.
Types of DIY Garden Irrigation Systems
There are various types of irrigation systems you can build, each suitable for different garden setups:
1. Drip Irrigation Systems
Drip irrigation systems are highly efficient, delivering water directly to the base of each plant through a network of tubes and emitters.
2. Soaker Hose Irrigation Systems
Soaker hoses are a simple and cost-effective way to irrigate gardens. These hoses release water slowly along their length, ideal for rows of plants.
3. Sprinkler Systems
Sprinkler systems are versatile and can cover larger areas. They are suitable for lawns and gardens but may not be as water-efficient as drip systems.
Materials and Tools Needed
Before starting, gather the following materials and tools:
- PVC pipes or flexible tubing
- Emitters, sprinklers, or soaker hoses
- Hosetimers
- Connectors and adapters
- Garden stakes
- Scissors or cutting tool
- Teflon tape
- Shovel or trowel
Step-by-Step Guide to Building a DIY Garden Irrigation System
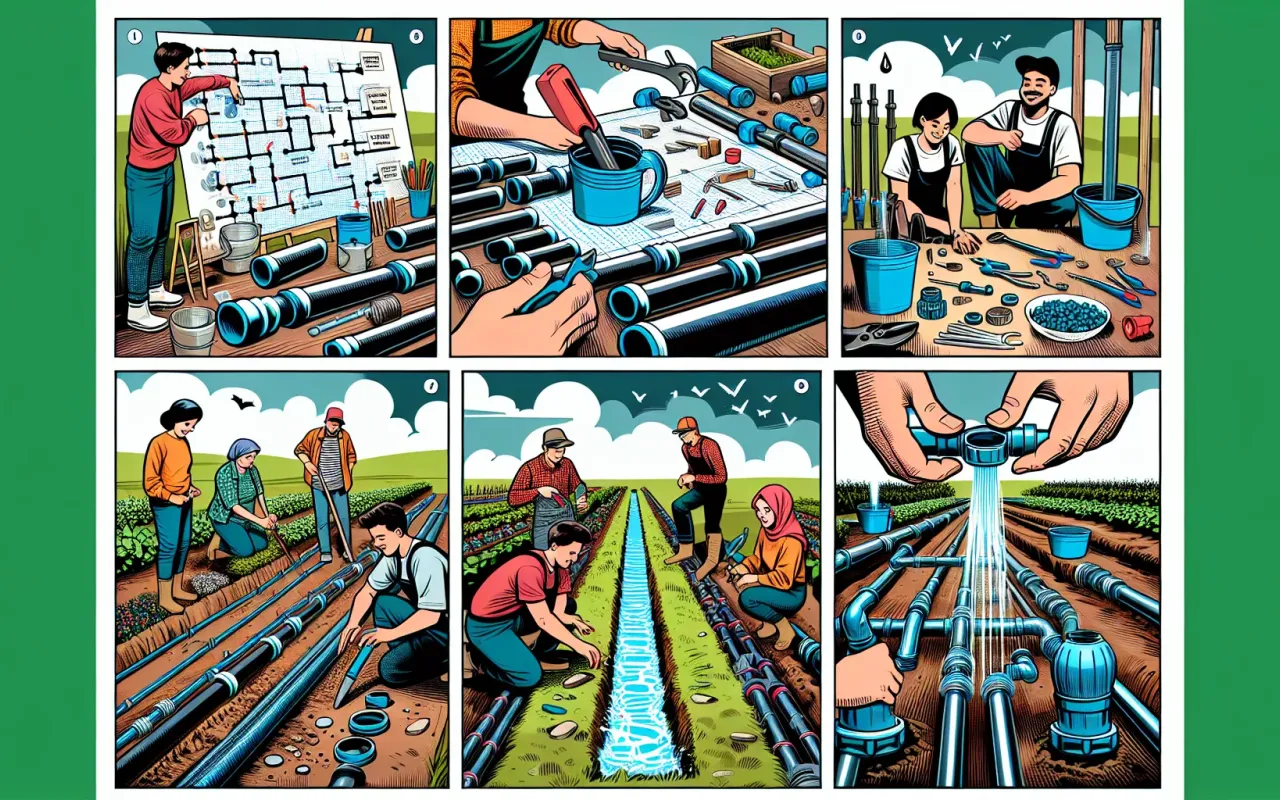
1. Plan Your System
Outline the garden layout and decide where to place emitters or sprinklers. Sketch a design, noting the position of each element and the water source.
2. Measure and Cut Tubing
Measure the required lengths of tubing or PVC pipes according to your plan. Cut the tubing using scissors or a cutting tool.
3. Assemble the Main Line
Connect the main line to the water source. Use connectors and adapters to attach the tubing securely, applying Teflon tape to prevent leaks.
4. Install Emitters or Sprinklers
Fix the emitters, sprinklers, or soaker hoses to the main line where needed. Secure them with garden stakes to keep them in place.
5. Lay Out the System
Position the tubing along your garden layout. Ensure it is laid flat and reaches all necessary areas.
6. Test the System
Turn on the water supply to test the system. Inspect for leaks and adjust the emitters or sprinklers to ensure even water distribution.
Maintenance Tips
Regular maintenance will keep your irrigation system running smoothly:
- Check for clogged emitters or sprinklers and clean them as needed.
- Inspect for leaks or damaged tubing and repair promptly.
- Adjust the watering schedule according to season and plant needs.
- Winterize the system by draining water and storing parts if necessary.
Conclusion
Building a DIY garden irrigation system is an excellent way to ensure your garden thrives with minimal effort. By following these steps, you can create a reliable and efficient watering system tailored to your garden's needs. A well-planned and maintained irrigation system will provide long-term benefits, saving both time and resources.